Create and Update Appointments
Creating Appointments
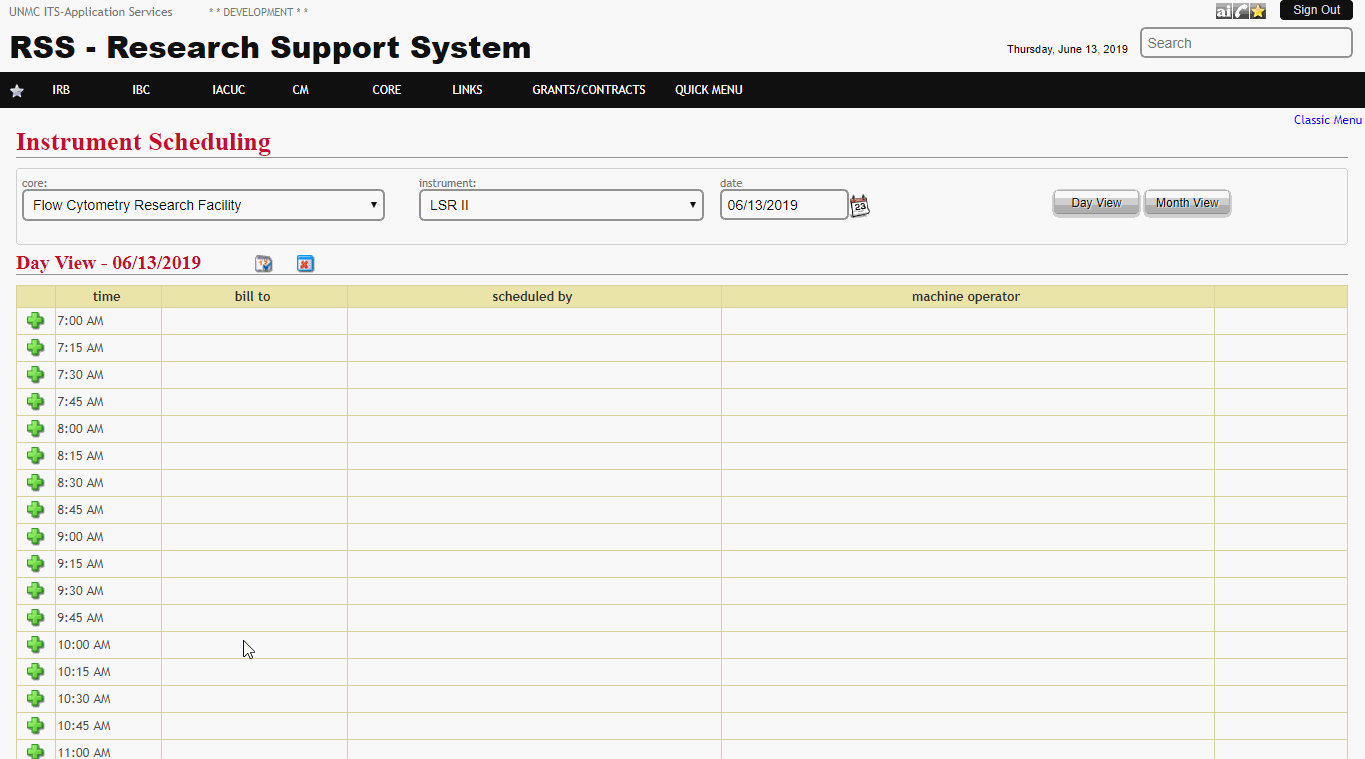
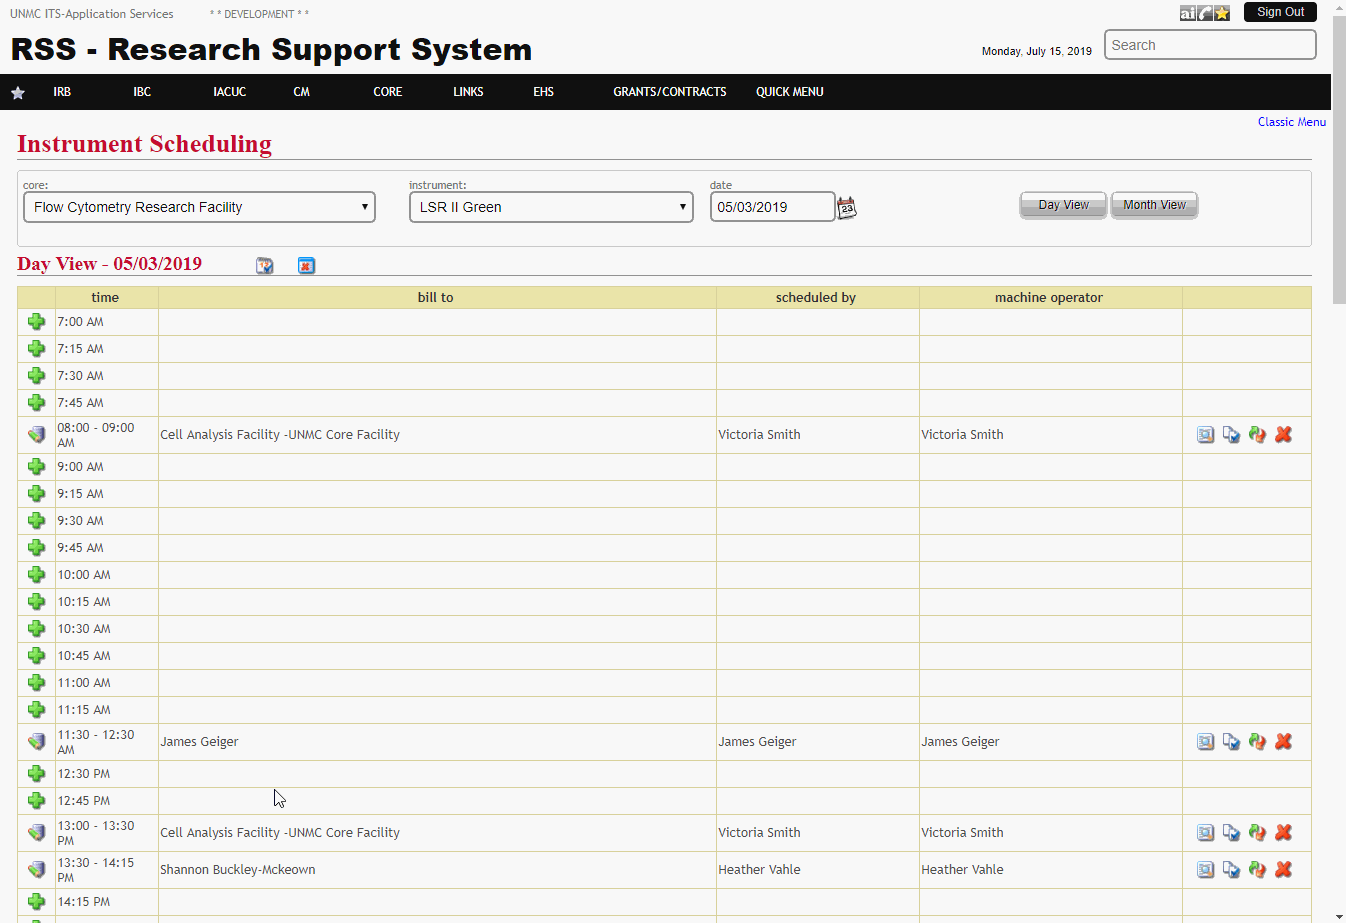
To create a new appointment on an instrument, access the "CORE" tab in the RSS. Under "Scheduling," select "Instrument Scheduler." Follow the instructions in the view schedule section to navigate to the date you'd like to create the appointment.
To create an appointment for an instrument using the online scheduler, you must first be given authorization by the core facility. Contact the core facility for additional guidance.
Show Step-by-Step Details
In the "Day View", click the "add" button next to the starting time for which you'd like to create a new appointment.

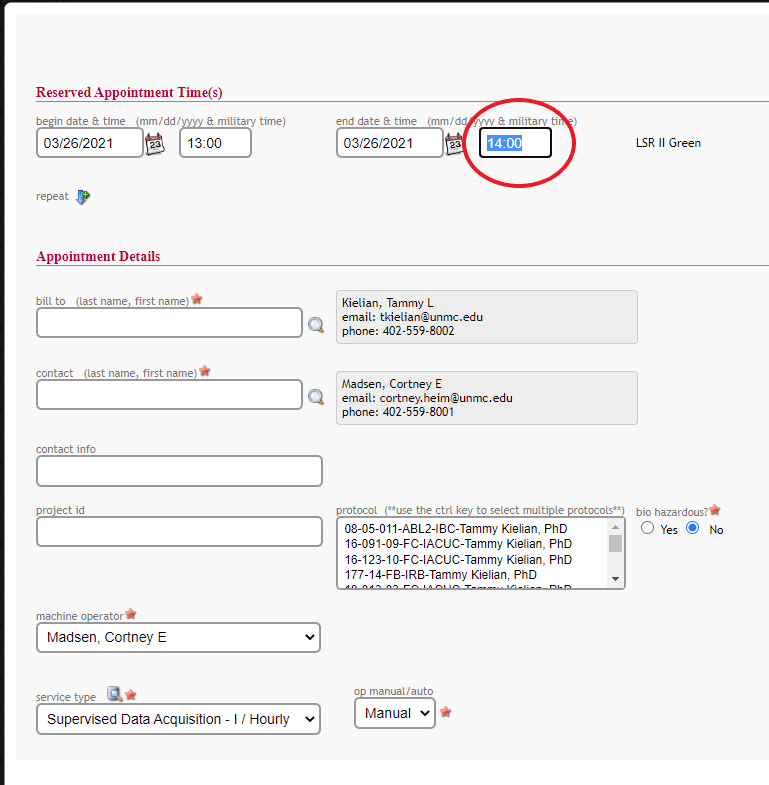
In the dialog box that appears, check the "Reserved Appointment Times" section to verify the instrument, date, and duration of the appointment you would like to schedule.
All times entered into the instrument scheduler are in the 24-hour format.

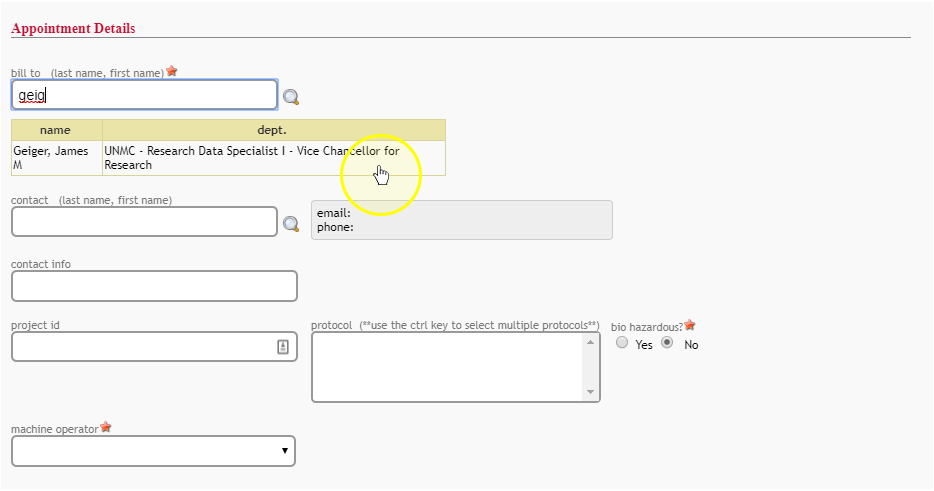
Next, enter the name of the person who will be billed. This should be the person who is financially responsible for the project being conducted, typically a Principal Investigator or University faculty member. While research associates, postdoctoral researchers, and students may request services from core facilities, the financially responsible person will typically be the person who is listed as principal investigator on the grant being debited for the work.
Enter a few letters of their last name into the "Bill To" field, then click the name of the person to select them. Once selected, their name will appear in the grey box next to the "Bill To" field.

If the contact person for the appointment should be different from the person who is being billed, enter their name into the "contact" field. This field works the same as the "bill to" field. This is generally the person who will be responsible for the samples. Generally, administrative assistants or departmental administrators should not be entered as the contact. Entering contact information will add that person to any automated notices that are associated with the appointment.
The contact field is a required field. If the billed person is also the requesting person enter their name again in this field.
This field works the same as the "bill to" field. Enter a few letters of their last name into the "contact" field, then click the name of the person to select them. Once selected, their name will appear in the grey box next to the "contact" field.
Enter any other contact information, like alternate numbers or good times to call, in the "contact info" field.
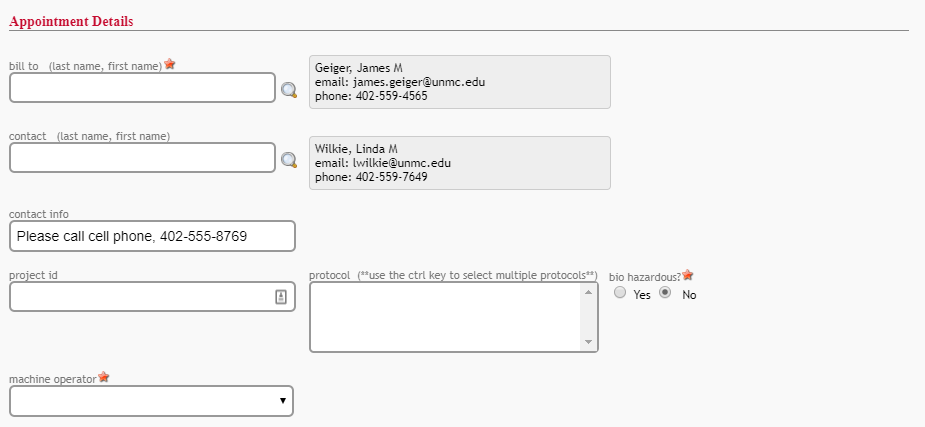
Information can be entered into the project fields to tie charges to a specific project. An internal ID may be included in the project ID field and the IRB/IACUCC protocol may be selected.
If the sample being submitted for analysis is biohazardous, mark the "yes" option.

In the machine operator dropdown, select the individual who will be performing the service or analysis. This may be a core facility staff member or a lab staff member who has received training from the core facility. If you're unsure who to select as the machine operator, contact the core facility.
The service type dropdown will list the available services that can be provided by the selected operator on the machine or instrument being scheduled. Select whichever one needs to be performed.
Once the bill to, machine operator, and service type fields have been entered, the application will calculate and display the estimated charges for this appointment.
Appointments made in the online scheduler must include a payment method in the form of a cost object.
Edit Appointment
To edit an existing appointment on an instrument, access the "CORE" tab in the RSS. Under "Scheduling," select "Instrument Scheduler." Follow the instructions in the view schedule section to navigate to the date of the appointment.
Appointments cannot be edited after having started. Additionally, core facilities are allowed to set appointment edit lockout times. Contact the core facility to change the details of an appointment that has already occurred, or is occurring soon.
Show Step-by-Step Details
In the "Day View", click the "edit" pencil icon next to the starting time for which you'd like to edit an appointment.

This will open the appointment allowing you to adjust the necessary fields. Type the corrected entries into the corresponding fields. Adjust as many of the fields as necessary
End dates and times must occur after the begin date and times If you need to edit a date/time span such that the new begin time occurs after the current end date/time start by adjusting the end date/time to avoid receiving an error.
When you are done making your adjustments click the save button at the bottom of the screen. You will receive a confirmatory pop-up if your changes have been saved successfully. Do not click the cancel or back button during this process.

Cancel Appointment
To cancel an existing appointment on an instrument, access the "CORE" tab in the RSS. Under "Scheduling," select "Instrument Scheduler." Follow the instructions in the view schedule section to navigate to the date of the appointment.
Core facilities are allowed to set cancellation lockout times. These may vary by core and by instrument. To avoid being charged for a no-show appointment, contact the core facility to cancel your appointment within the lockout window.
Show Step-by-Step Details
Navigate to the appointment that you would like to cancel. Select the "delete appointment" icon from the far right column.

This will open a new dialog box asking for the reason for the cancellation. Uncheck the "send email" checkbox unless you want to notify the other named persons on the appointment of the cancellation. Click the "Cancel Appointment" button to compete the cancellation.
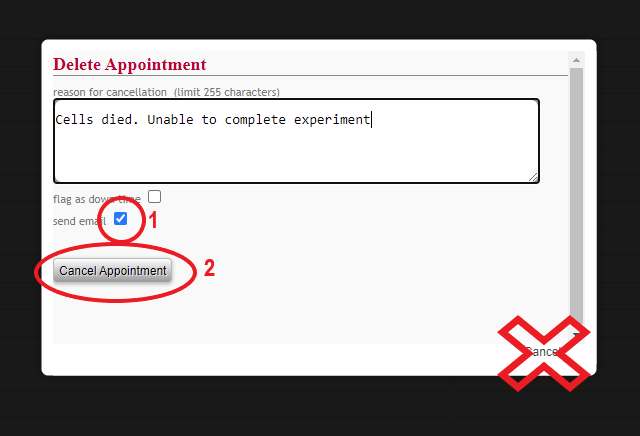
DO NOT click the cancel link at the bottom of the pop-up. This will "cancel" your cancellation. Use the "Cancel Appointment" button to remove an appointment from the schedule.